
Nodes are part of the basic elements of the Linkfacts tool.
When creating your graph, you may have noticed that one node’s been created with the name of your graph. It’ll remain the main node of your graph.
Editing a node #
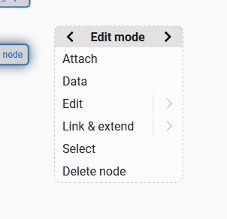
To edit a node, left-click on it and move your mouse over the “edit” arrow.

You’ll have several edit options here :
- Label
- Node type
- Set visual
- Size
- Color
- Border
To edit the name of your main node, click on the “Label” option.
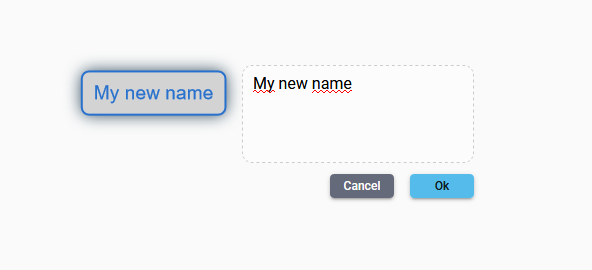
Select your new node name, click “Ok”.
You’ve successfully changed your main node name !
You can also edit other options of the nodes we saw above : its size, color, border, etc.
Create a node #
Most of the times, your nodes will be linked to other ones.
To create a linked node, go to “Link and extend”, then “Create linked node”.
The nodes can be of different types : a shape, text, an icon, an image.
You can chose the type of your node here.
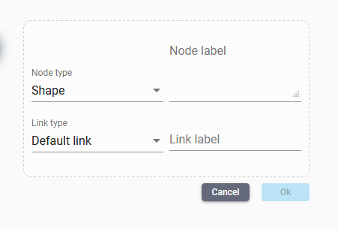
The node label is related to the visible name of the node. Name it as you wish.
Later, you’ll also be able to change the link type between your two nodes.
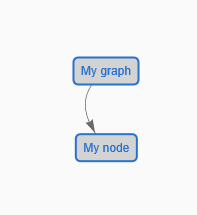
Click “Ok” to see your new node created, and linked to your first one : “My graph” in our case.
You can also create a node outside of any link.
To do so, simply double click anywhere else of a node.
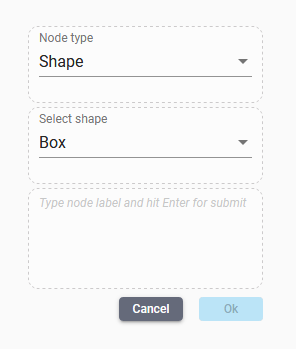
Then, chose again your node type, its shape, and its label.
Node types #
On Linkfacts, several node types are available by default :
- Shape
- Texte
- Icon
- Image
However, it is also possible to create and customize node types.
To do so, left-click on a node, go to the “Edit mode” of your node, and go to “Linkd & extend”.
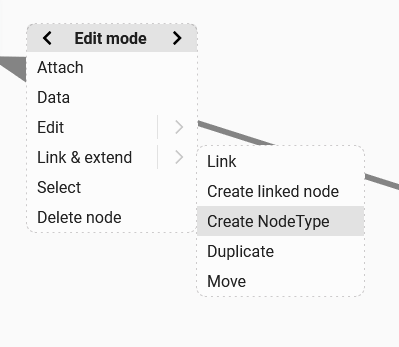
Click on “Create Node Type”.
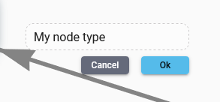
Chose the name of your new node type, and click “Ok”.
You’ve succesfully created a new node type. 🙂
You can then customize your node type and reuse it wherever you want in your graph.
Adding nodes with the Linkfacts toolbar #
A simple way to add basic node types is to use the Linkfacts toolbar on the left.
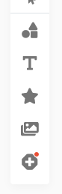
By clicking once on “Shape node”, “Text node”, “Icon node”, or “Image node”, you have the possibility to add directly to your graph a node of the type you have selected.
The bar also allows you to view the custom node types you have created or retrieved.
To add a node linked to another one with the toolbar, hold the click once your mouse on the node type you have chosen, and release it on a node.
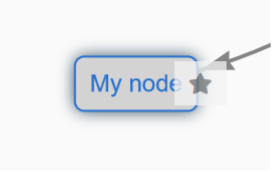
Here, we linked an icon node to the node “My node”.
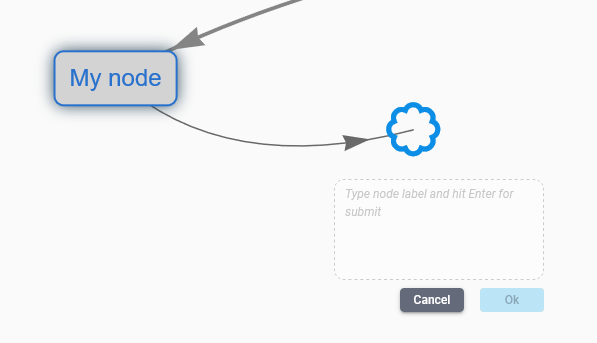
By selecting the label of our new node, we now have an icon type node linked to “My node” !
Attach a file to a node #
If you want to attach a file to a node, left click on it, and select “Attach”.
You’ll then have two options :
- Upload a new document from your PC.
- Or put a document URL.
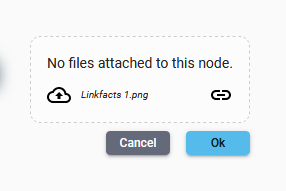
Chose the way you want to add your document, and click on the “Ok” button.
Now you’ve added a document to your node.
If you or anoyone (if the graph is public) double click on it, you’ll be redirected to an URL containing the file you just added.
You can manage all the files you uploaded in the media section of linkfacts.
Drag and drop documents #
Another and simple way to attach a document, video or file to your graph is drag and dropping it.
To do so, open the document you want in another tab or window.
Left click one time on the URL of the document you desire to add on your graph.

Left click on the URL again and maintain the click.
Drag the URL to your graph, and drop it where you want.
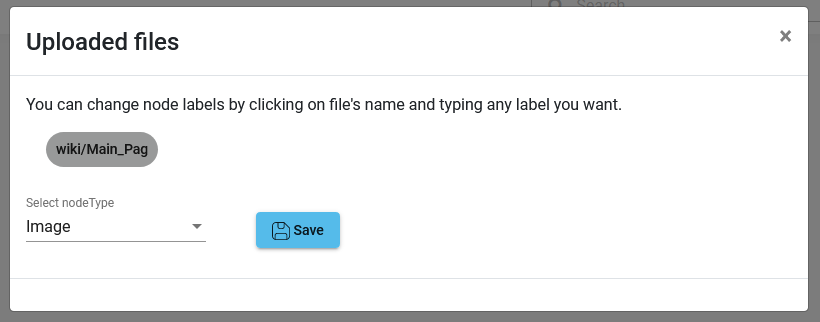
Select the node type you desire a new label if you want, and click on “Save”.
Automaticly, the document you’ve added will generate a thumbnail and use the title of your source as its label name.
To add a document on your computer, proceed in exactly the same way.
Now you can see your document successfully added to your graph !

Duplicate a node #
It may frequently be necessary to duplicate a node.
To do so, left-click on a node, select the “Edit mode”.
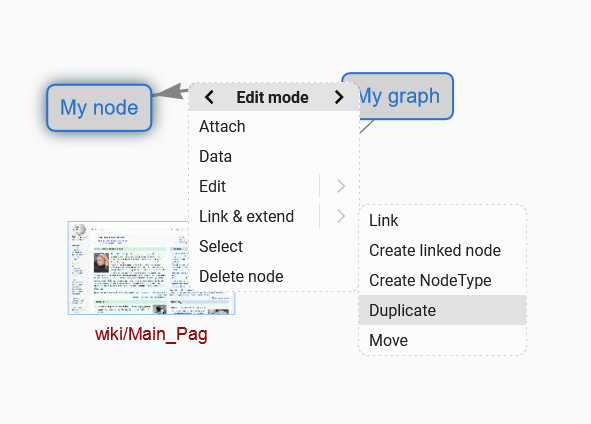
Go to “Link & extend”, and click on “Duplicate”.
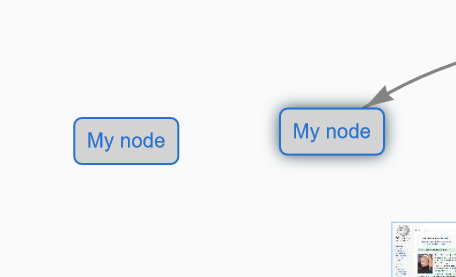
You can now see your new node identic as the old one


